Why a tunnel?
- Opening up a port on a home network isn’t the greatest idea. It is a security risk, a hole waiting for a hacker/bot to sneak in using a known vulnerability.
- Many ISP‘s and routers prevent you from opening up ports 80 and 443.
- Another challenge you will face is setting up a dynamic DNS.
- Finally, when your domain is pointing to your home IP address it is very easy to determine your home location.
Cloudflare’s Tunnel
This is where Cloudflare’s tunnel comes in. It builds a tunnel to cloudflares network. Now all request to your domain get directed through this tunnel to your web-server. all without opening any ports! and your domain simply points to cloudflare.
![]()
Pre-requisites
- Assumes you already have a domain name configured to use Cloudflare’s DNS service. This is a totally free service.
- Assumes you already have a Linux server with Nginx and Let’s Encrypt.
1. Install
First we will get cloudflared installed as a package to get everything going. Then we will transfer it over to a service that automatically runs on boot in the background and establishes a tunnel.
$ wget https://github.com/cloudflare/cloudflared/releases/latest/download/cloudflared-linux-arm64.deb
$ sudo dkpg -i cloudflared-linux-arm64.deb
*Note this link is for a raspberry pi, for other binaries see here.
This will create a folder in the home directory ~/.cloudflared.
2. Authenticate
Next, we need to authenticate with Cloudflare.
$ cloudflared tunnel login
This will generate a URL which will take you to login into your dashboard on Cloudflare.
3. Create tunnel
$ cloudflared tunnel create <NAME>
Replace <NAME> with any name of your choice.
Running this command will:
- Create a tunnel by establishing a persistent relationship between the name you provide and a UUID for your tunnel. At this point, no connection is active within the tunnel yet.
- Generate a tunnel credentials file in the default
cloudflareddirectory.
Confirm that the tunnel has been successfully created by running:
$ cloudflared tunnel list
4. Create a configuration file
Now, create a configuration file in your .cloudflared directory. Using your favorite editor create a file config.yml, the content should look like this:
tunnel: <Tunnel-UUID>
credentials-file: /home/username/.cloudflared/<tunnel-UUID>.json
originRequest:
  originServerName: mydomain.com
ingress:
  - hostname: mydomain.com
    service: https://localhost:443
  - service: http_status:404
A couple of things to note, here:
- Once the tunnel is up and traffic is being routed, Nginx will present the certificate for
mydomain.combutcloudflaredwill forward the traffic tolocalhostwhich causes a certificate mismatch error. This is corrected by adding theoriginRequestandoriginServerNamemodifiers just below the credentials-file - Cloudflare’s docs only provide examples for HTTP requests, and also suggests using the url
http://localhost:80. Although Nginx can handle 80 to 443 redirects, our ingress rules and ARGO will handle that for us. It’s not necessary to include any port 80 stuff. - if you want to host additional services via subdomain, just simply list them with port 443, like so:
 - hostname: subdomain1.mydomain.com
    service: https://localhost:443
  - hostname: subdomain2.mydomain.com
    service: https://localhost:443
Just insure the last line is - service: http_status:404.
5. Modify your DNS zone
Now, we need to setup a CNAME for the TLD and any services we want. The cloudflared app handles this easily. The format of the command is:
$ cloudflared tunnel route dns <UUID or NAME> <hostname>
Do this for each service you want (i.e., subdomain1, subdomain2, etc) hosted through ARGO.
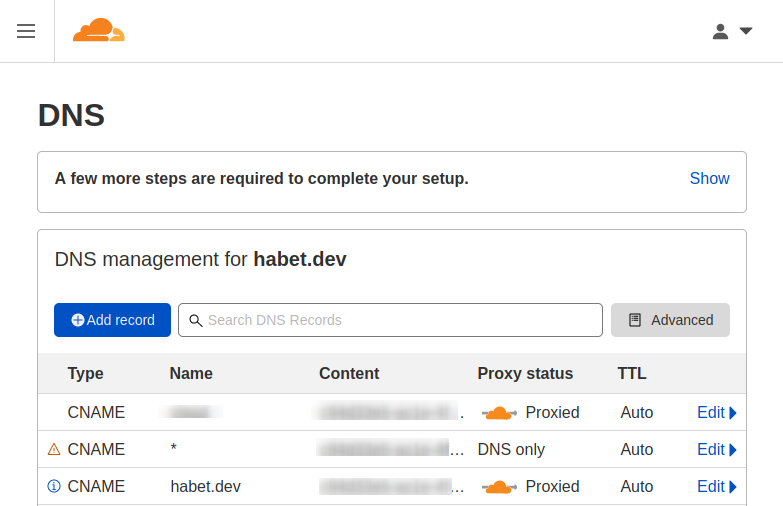
Cloudfalres DNS dashboard
6. Test the Tunnel
Run the tunnel to proxy incoming traffic from the tunnel to any number of services running locally on your origin.
$ cloudflared tunnel run <UUID or NAME>
The above command as written (without specifying a config.yml path) will look in the default cloudflared configuration folder ~/.cloudflared and look for a config.yml file to setup the tunnel.
If everything’s working, the end of the output should be:
...
...
<timestamp> INF Connection <redacted> registered connIndex=0 location=ATL
<timestamp> INF Connection <redacted> registered connIndex=1 location=IAD
<timestamp> INF Connection <redacted> registered connIndex=2 location=ATL
<timestamp> INF Connection <redacted> registered connIndex=3 location=IAD
Now, try to access your website and your service from outside your network – for example, a smart phone on cellular connection is an easy way to do this. If your webpage loads, SUCCESS!
7. Convert to a system service
You’ll notice if you Ctrl+C out of this last command, the tunnel goes down! That’s not great! We want it up all the time. To do that we turn cloudflared into a service.
$ sudo cloudflared service install
Move the files to /etc/cloudflared
$ sudo mv ~/.cloudflared/* /etc/cloudflared/
Check ownership with ls -la, should be root:root.
Now we need to fix the config file, replace the line:
$ credentials-file: /home/username/.cloudflared/<tunnel-UUID>.json
with
$ credentials-file: /etc/cloudflared/<tunnel-UUID>.json
Then, start the system service with the following command:
$ sudo systemctl start cloudflared
And start on boot with:
$ sudo systemctl enable cloudflared
Check the status with:
$ sudo systemctl status cloudflared
The output should be similar to that shown in Step 6 above. You can safely delete your ~/.cloudflared directory.
Final Thoughts
We now have a web-server serving the internet without opening any ports on our network.
Credits:
- Reddit user : u/highspeed_usaf
- The cloudflare docs.
- Boruch Niebloom and Moshe Uminer for correcting mistakes.